Where
to
Buy
Where can I buy a License?
The only place to buy an ImagR License is on https://design-gecko.com/imagr/
You can pay with Paypal or Credit Card.
The only place to buy an ImagR License is on https://design-gecko.com/imagr/
You can pay with Paypal or Credit Card.
After purchasing the license, code will be displayed on your screen. You'll also recieve an E-Mail with your license key.
The subject is "Your Design Gecko order is now complete".
You can also find your license on https://design-gecko.com/my-account/
Click on orders -> "View", "License Keys", or here to see your keys.
Navigate to https://www.imag-r.com/login
Login with the same credentials as you have on Design Gecko.
Copy and paste your license key in the input field called "License key".
Click the "Activate" Button, and everything's ready.
Now, you're able to use all features, you'll have a cleaner layout and of course no advertising.
ImagR does extend the license automatically.
When your license is expired,You'll see the advertising again and lose access to the paid features.
You get an Email one week before your license expires to remind you
Just extend the license or buy a new one if you want to use imagR further.
Please make sure you definitely purchased an online key.
You can check that easily, if it starts with 1M, 6M, 12M or LT it's an online license.
Also make sure to copy and paste the license, DO NOT type it in.
If you still struggle, please contact us on imag-r.com/contact.
imag-r.com is an online application, means you're always up to date.
However, we recommend to delete you browser cache regularly, to make sure everything is working as expected, especially after updates.
To be honest there's not really a difference in modern browsers, we recommend to use your personal preference.
Ideally it's one of these 4:
Chrome | Firefox | Edge | Safari
Websites can be a little tricky sometimes. We recommend to watch our "How to buy and activate ImagR Online“ video and follow the steps.
You can find the video here:
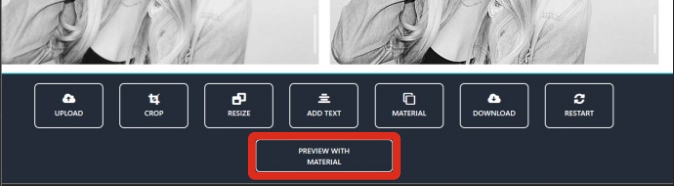
This option is used to upload an image on imag-r.com
Allowed Formats: JPG | JPEG | PNG | BMP.
You can also Drag and Drop your images.
Crop allows you to cut out the necessary part of your image.
Mostly used to remove empty areas and make the suspect more focused.
Most important step. Especially online.
Resize your image to your real needed size and choose the right DPI for your laser.
Without resizing your image the loading time will increase tremendously and you will run more likely into errors.
Particularities: After resize it will show you the advanced sidebar, where you can make changes like brightness, gamma etc. Also described underneath.
Add any text to your images. This feature is only available in the online version for now.
Choose one of our unique algorithms.
The difference between them is described underneath.
We recommend to test all of them since it's still a personal preference thing.
Download your prepared image as PNG, BMP or JPEG.
We recommend PNG, since there‘s no difference in quality, but the file size is way smaller.
Particularities - Paid Users: After you applied an algorithm it will show a "DPI Test“ Button in the Download section. Explained in detail underneath.
Flush your files from our server by hitting the restart button.
No worries if you didn't, your file will be removed automatically after 20 minutes.
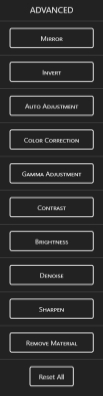
After you resized an image it will show you the advanced sidebar.
You can use a lot of awesome manipulation tools.
We will also explain you every feature underneath.
Possibilites:
Paid Users:
Mirror | Invert | Auto Adjustment | Color Correction | Gamma Adjustment | Contrast | Brightness | Denoise | Sharpen | Remove Algorithm |
Free Users:
Mirror | Invert | Gamma Adjustment | Contrast | Brightness | Sharpen* |
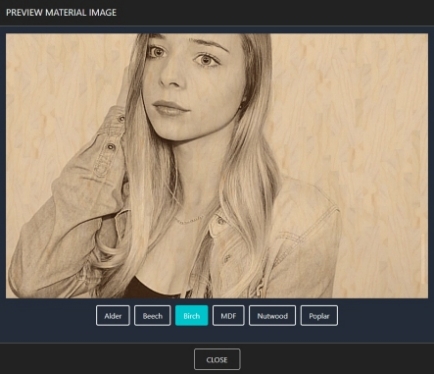
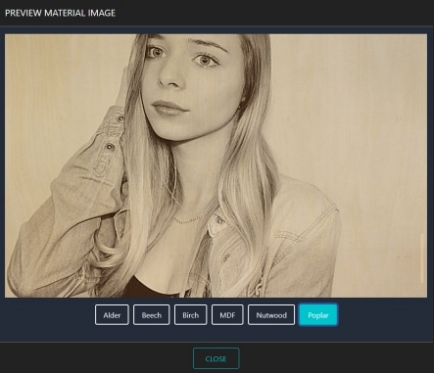
As soon as you've chosen an algorithm it will show you this button. The function behind it is to display your image on your chosen material. If you choose for example wood, you can choose between different wood types, like in the image underneath.
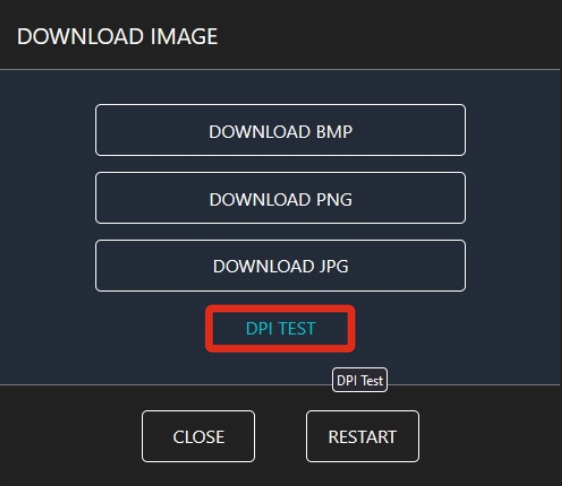
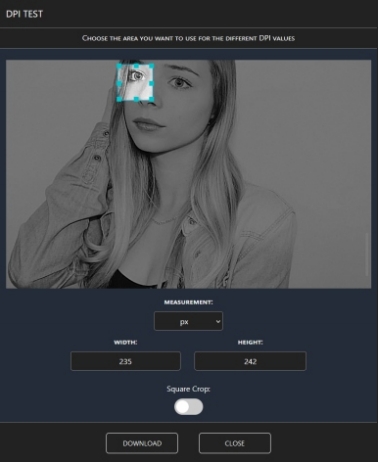
When you applied an algorithm, you're able to use the DPI Test Feature.
This feature allows you to choose a specific area of your image and download it with your preparations in different DPI values.
With these files you can elaborate which DPI works best for your laser/material.
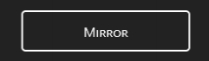
With this option you are able to mirror an image horizontally.
There's no option - and no need - to mirror an image vertically.
Mostly used for transparent materials like glass, acrylic, in combination with inverting colors.

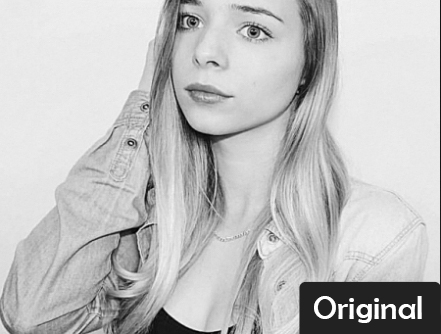
Invert will change your colors to the opposite.
In example: "black turns white"Mostly used for transparent materials like glass, acrylic, but also for materials where the engraving is brighter then the material. (Slate)
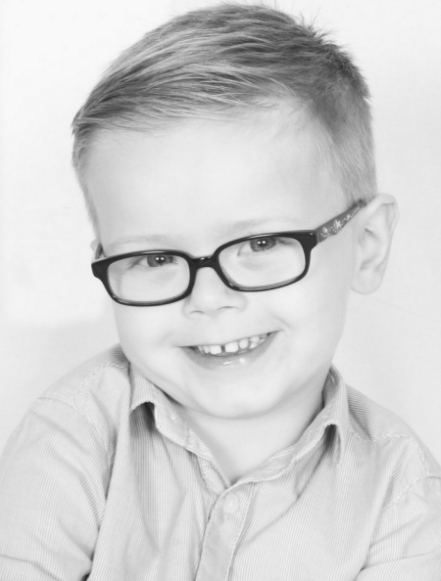
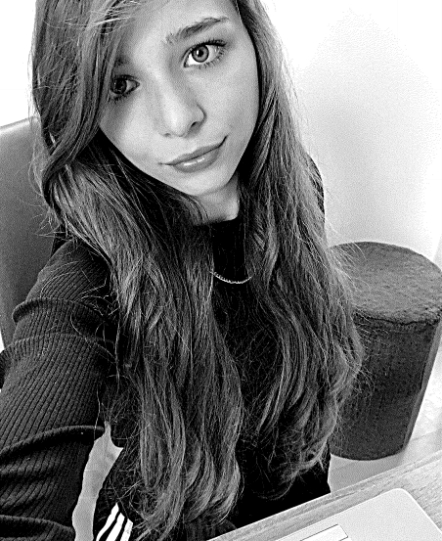
Auto Adjustment detects the amount of light/dark colors in your image and correct them then.
If the image is very bright, it will try to reduce the whites to a normal level. Opposite happens when the image appears to dark.
It also show often hidden details in images, which where lost due the overexposure.


Your laser often doesn't like black blacks.
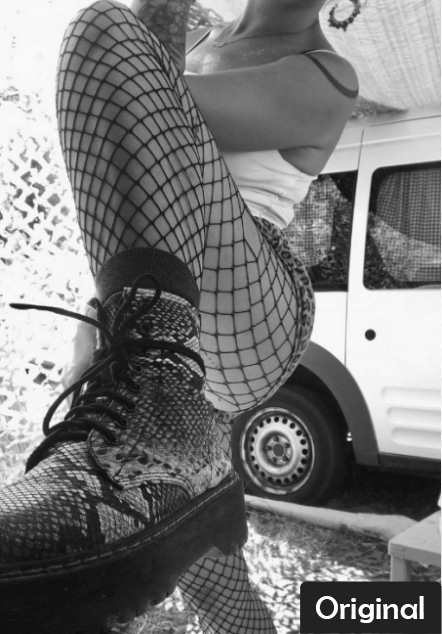
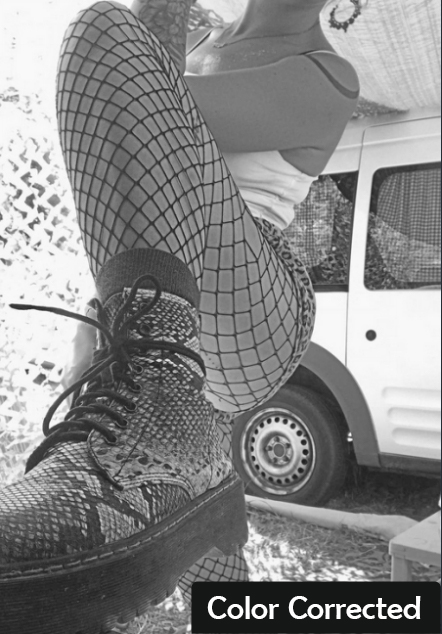
Means we have created this function to reduce the very dark areas in your image. The difference to Auto Adjustment is, that it search for colors in certain ranges and change them according to our algorithm.
In example, Auto Adjustment leave „good tuned“ images like they are, while color correction still will fix the dark areas.
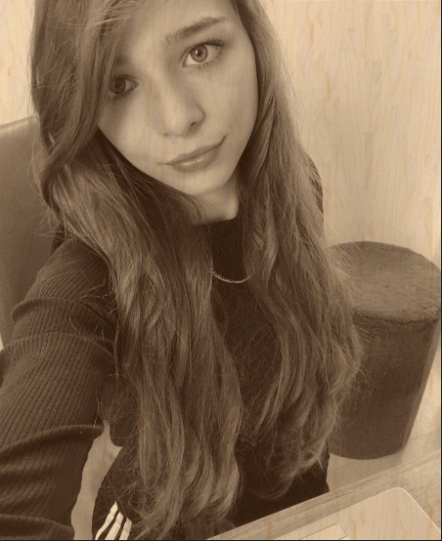
You can see it for example here on her shoe, or the tires of the car.
Mostly used for wood or black slate images, but also work on other materials pretty good. Not recommended for the norton tile method. (you need your blacks there)
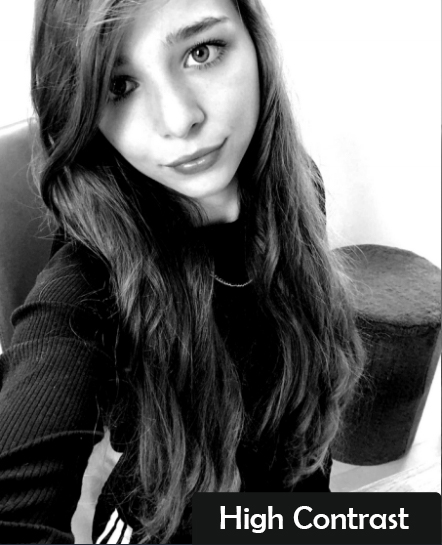
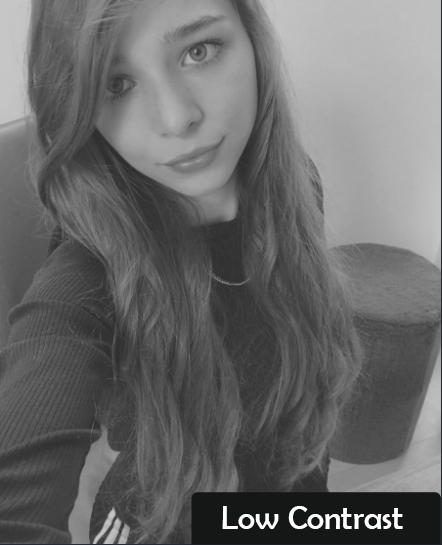
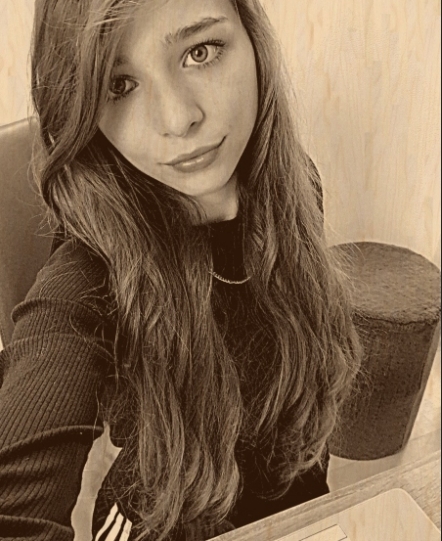
The contrast of an image refers to the difference between the light pixels and dark pixels.
Low contrast images contain a narrow range of colors while high contrast images have bright highlights and dark shadows.
In example, Auto Adjustment leave „good tuned“ images like they are, while color correction still will fix the dark areas.
Adjusting the contrast can either make an image more vivid or can mute the tones for a more subdued feel.
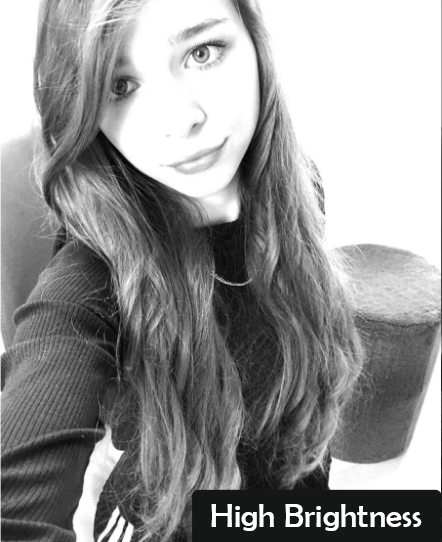
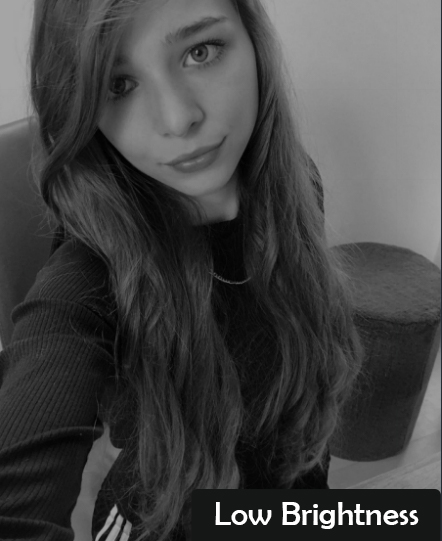
Brightness increases the overall lightness of the image—for example, making dark colors lighter and light colors whiter - while contrast adjusts the difference between the darkest and lightest colors.
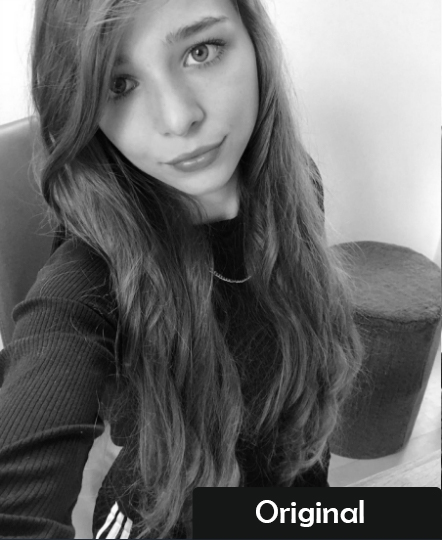
Below is an example of adjustments made to the brightness of an image.
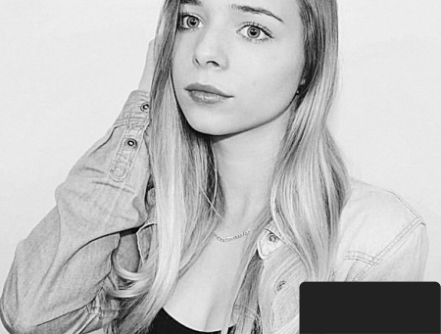
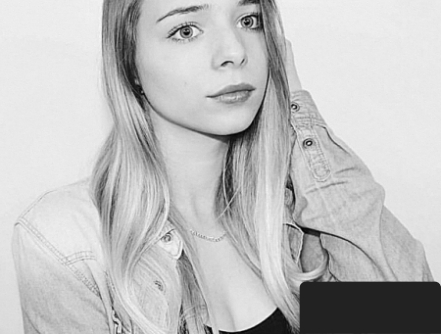
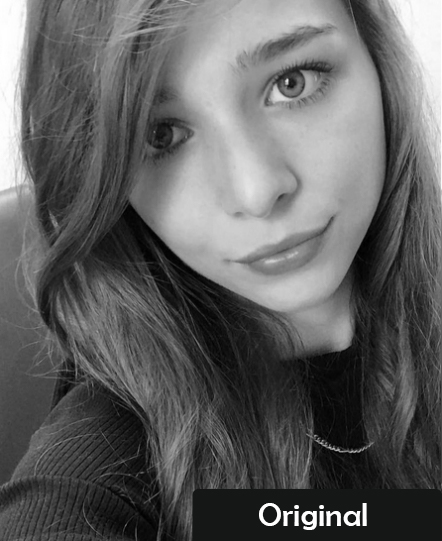
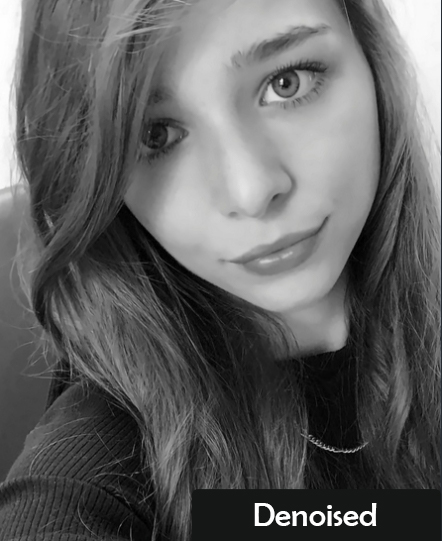
Denoising consists of reducing noise in an image.
Note that it is often not possible to completely cancel the noise.
In the image below you can clearly see a way smoother skin especially in the face area.
We recommend to use the value 30 on imagR for denoising, or less. Increasing the value can cause serious loading times.
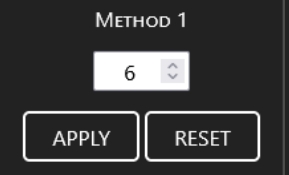
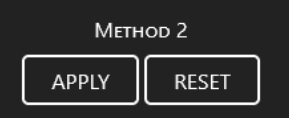
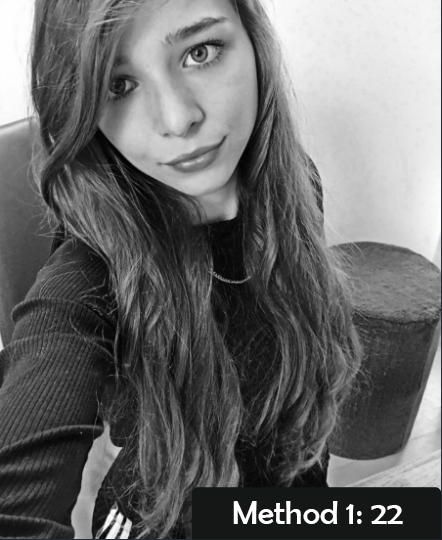
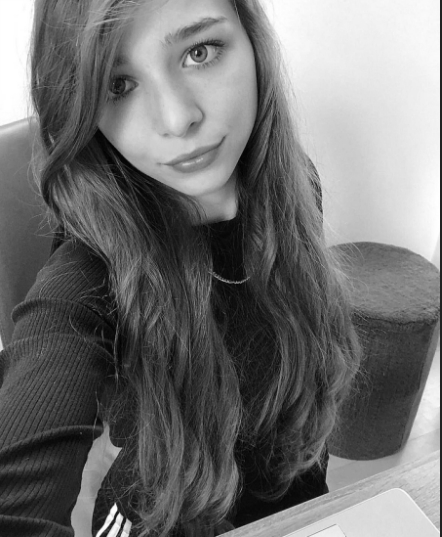
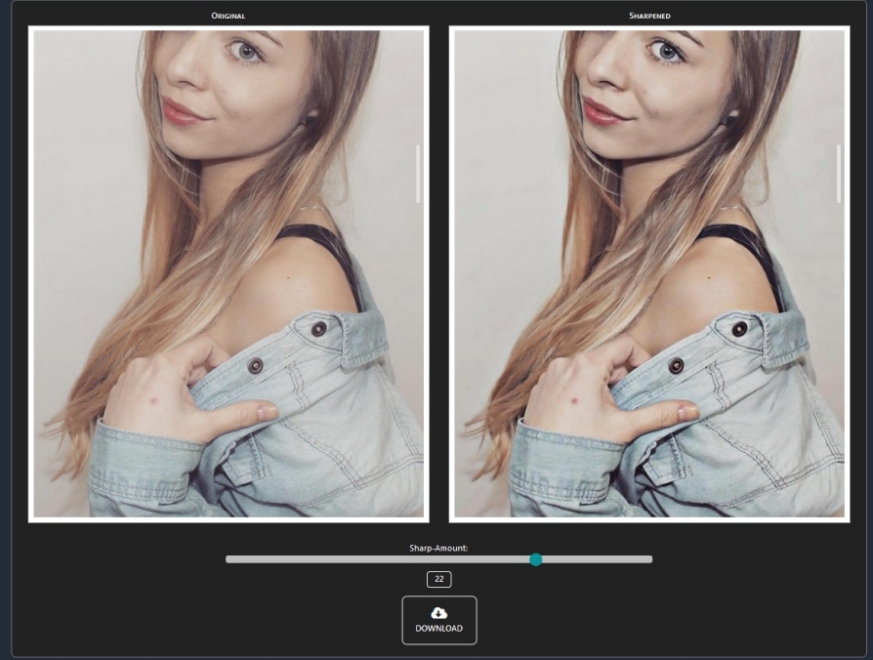
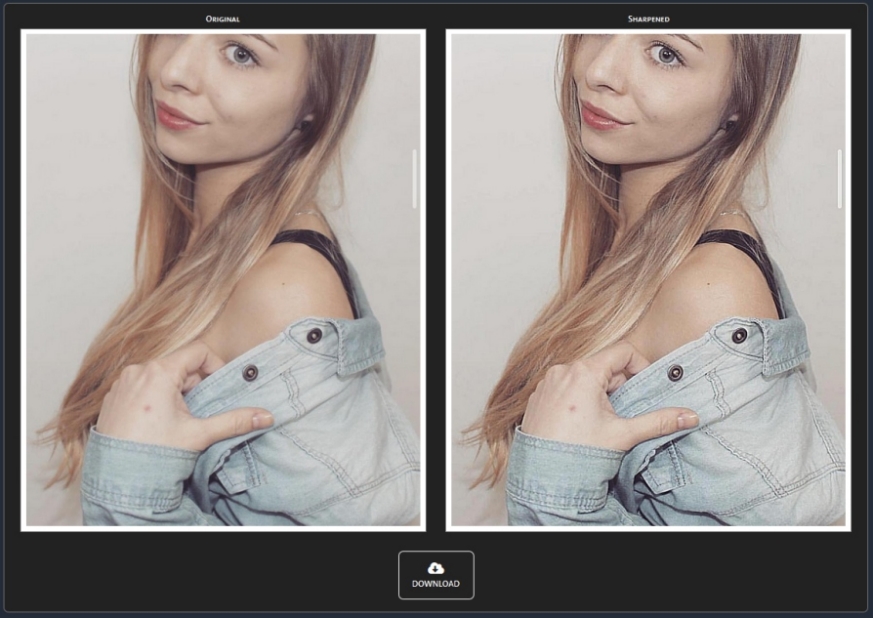
On the Sharpen feature you can decide between 3 different methods:
Manual Process | Method 1 | Method 2
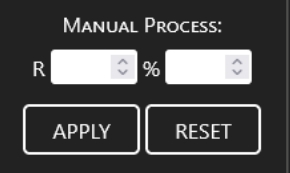
What is R?
R means Radius and controls the amount to blur the original for creating the mask.
This affects the size of the edges you wish to enhance, so a smaller radius enhances smaller-scale detail.
What is %?
Amount is listed as a percentage and controls the magnitude of each overshoot (how much darker and how much lighter the edge borders become).
This can also be thought of as how much contrast is added at the edges. It does not affect the width of the edge rims.
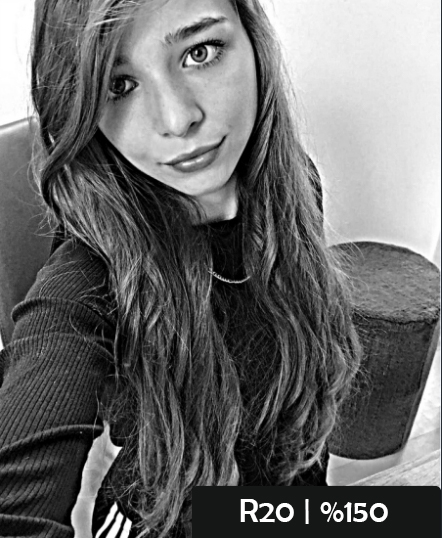
What is Method 1?
Method one decides on the edges and significant characteristics of your image what has to be sharpened and how much.
You can still decide the intensity with the input field.
It's on 6 by default, we recommend to stay under 30.
On some images you can get weird artifacts if you oversharp the image.
What is Method 2?
Method two works like method one, just way more subtile and less aggressive.
Another difference is, it sharpen all details, while Method 1 skips "unnecessary" areas.
You can't adjust anything on this algorithm, but there's also no need to.
I use this option on every image I prepare, and it always looks better than the original image.
For me one of the most important steps on ImagR.


You only see this button if you already applied any material.
If you click it, it will remove the algorithm and it redirects you back to the grayscale image.
Difference
between

and

Reset All: Resets every single setting you made on the advanced settings.
Reset: Resets only the adjustment you currently made, for example on the manual sharpen method.
No changes on Advanced Settings. Just applied the algorithm.


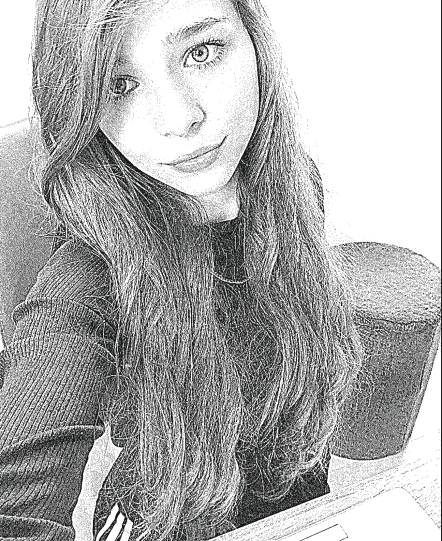
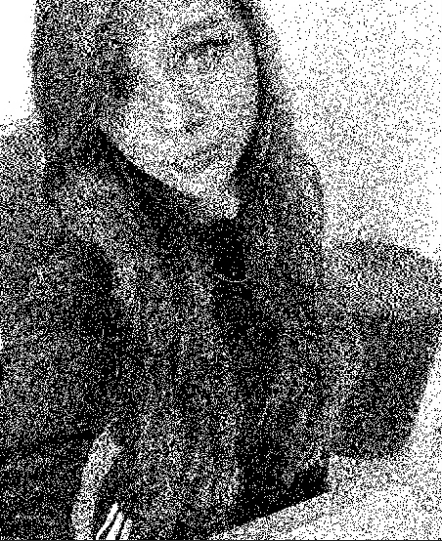
This is the first imagR algorithm.
It has a high amount of contrast and sharpening, as well as some brightness fixes. Mostly used for "more comic-like" images.

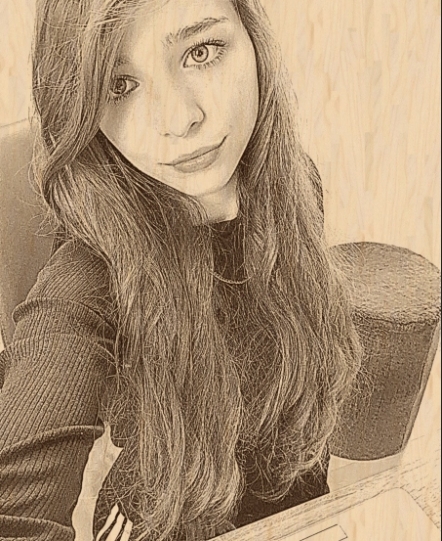
Shows images way more realistic. The head behind this algorithm "Nicky Norton" had some stunning results with this algorithm, so we recommend it for diodes.
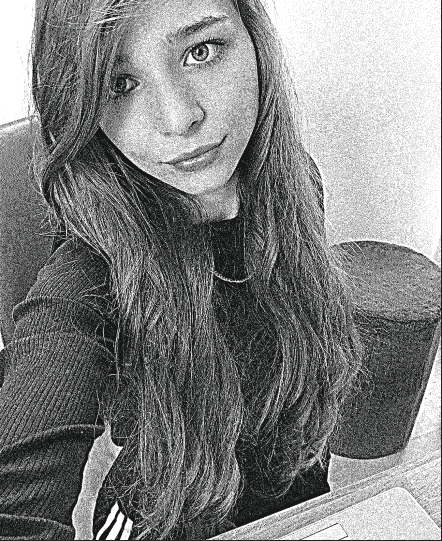
Does some radical color corrections, works very well for Co2 Lasers with almost no futher adjustments.
Also work for diodes on wood pretty well.

Prepares the image in a natural way. Has a subtile but effective sharpening method which really pop the details.
Can be used on diode as well as on Co2 Lasers.
Probably the most natural algorithm.
Mostly used for diodes, but also on Co2 Lasers very detailed.
You need to know your exact DPI for this algorithm.

Marcin automatically reduces the noise in your image, enhance the edges and has a subtile sharpen in it. All in all a perfect algorithm for black slate, no matter if diode or Co2.
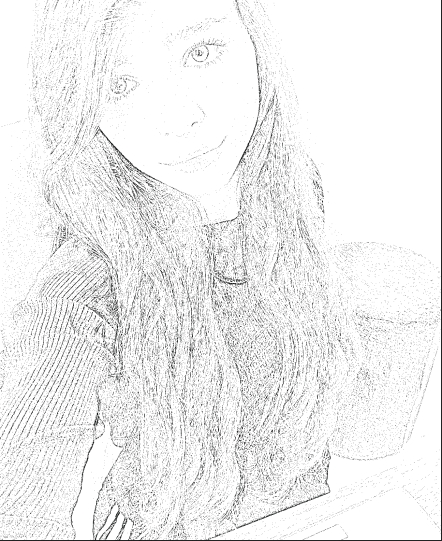

Turns your image into a pencil sketch. Can be hard to get right on some images. Works great for cars, buildings and other "edgy" things.
Very special way for auto sharpening your image.
Does a little color correction, and has a unique dither pattern.
Works really good on all laser types.

Probably the most used algorithm.
Shows the image pretty natural, unique pattern with little sharpening.
It's forgiveable and a good starter for image engraving.

Does heavy color correction especially on black and whites.
Increase details a lot, can be hard to dial in power.
Awesome for glass and acrylic images.
Co2 and Diode approved.

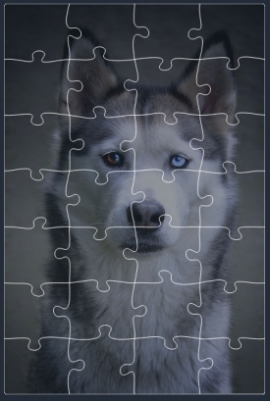
Tab Size: Decide how big the joints are to combine the puzzle
Seed: Decides in which direction the joints are facing
Angle: Decides the angle of the puzzle parts
Corner Radius: Creates a round corner on the puzzle edges
Pieces: Decide how many pieces your puzzle should have
Size: Decide the final size of your puzzle in millimeters
Prepare your image first on imag-r.com.
Next, upload the prepared image on the puzzle and set the same size for the puzzle as the image has.
Make sure the joints aren‘t directly in eyes or on faces.
At the end download the puzzle svg pattern by clicking on download. Import the prepared image into Lightburn, overlay it with your puzzle SVG and you're good to go!
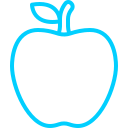
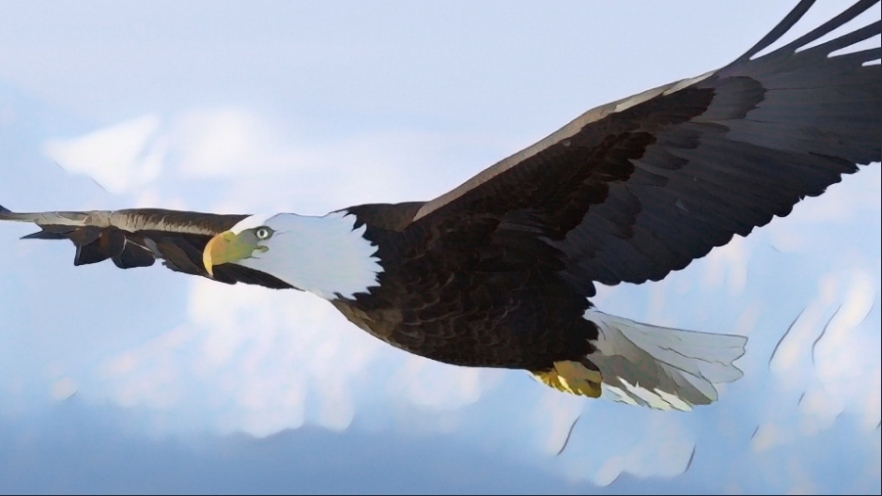
Upload any shape and it will create automatically an outline!
Works perfectly with black sillouettes.
To find useful files we recommend to google i.e for "eagle sillouette".
You can upload PNG and JPG/JPEG Files.
The downloaded File will be a SVG File.
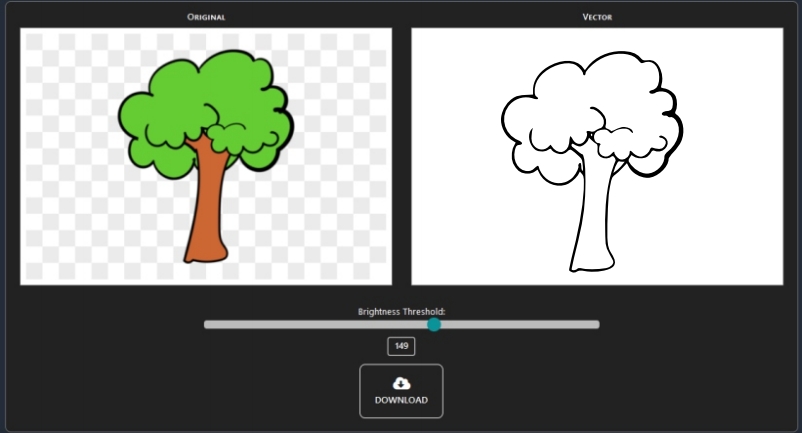
The Threshold slider decides how much of an object should be outlined.
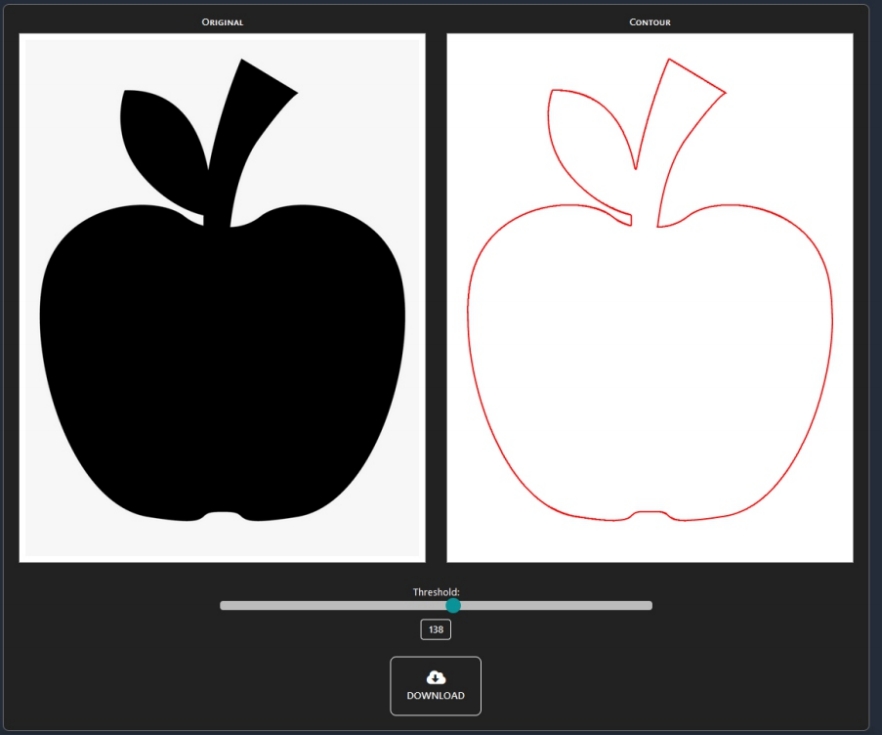

Image masking means, when you i.e cut out a specific part of your image in a specific shape.
Underneath we have a girl masked in a heart shape.
You can upload also your own masking shapes, we recommend to use black sillouettes.
Use PNG or JPG/JPEG Files for your own masks, there's no need for a transparent background.
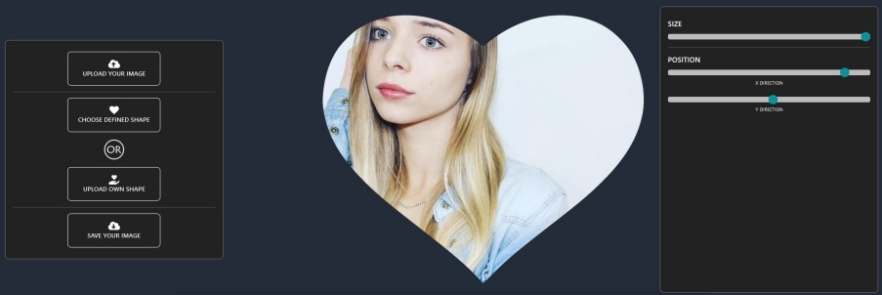
Left Side:
Upload Image: Upload your image which should get masked
Choose defined shape: We've already made a few masking shapes, you can use them.
Upload own shape: Upload any dark shape and it will create a masking shape out of it
Save your image: Opens a download modal, where you can save it as PNG, BMP or JPG
Right Side:
Size: Change the size of your mask
Position: Move the mask above your wished area with these sliders.
Prepare your image first on imag-r.com.
Upload your prepared image
Choose a defined shape or upload your own shape
Download the image as PNG file
Import it into your laser software and engrave the image

Often your workarea isn't big enough to create really big images.
So we created the slice function. Let's assume:
Your biggest piece of wood can be 200x100mm
With slicer, you can slice an image with 400x200mm in 2 pieces,
engrave them and combine them after.
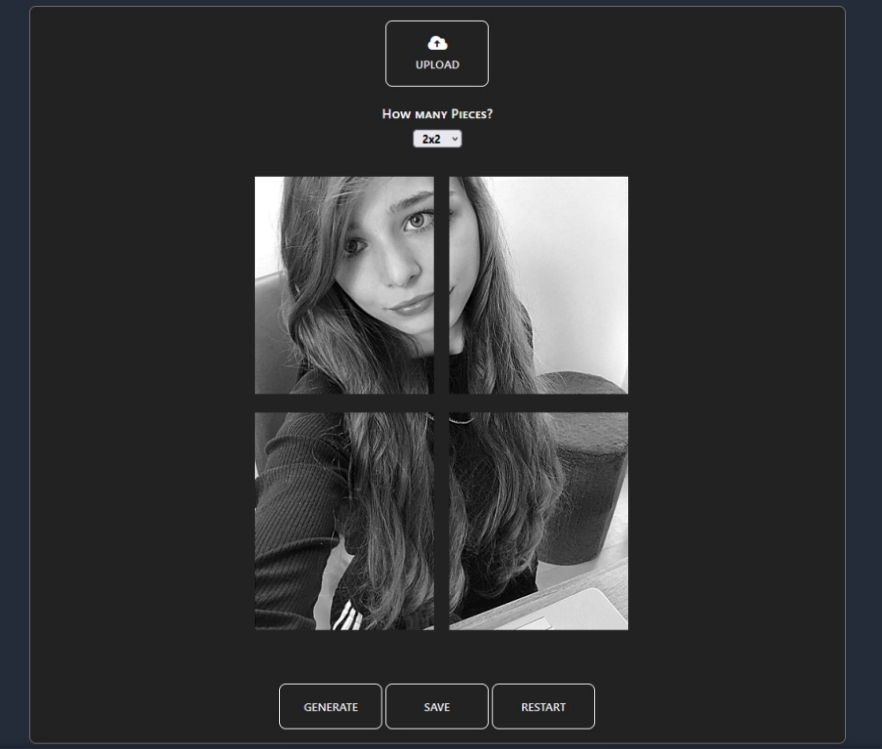
Prepare your image first on imag-r.com
Upload your prepared image
Choose how many pieces you want
Click the Generate button to split the image
"Save" will download a .ZIP File with your pieces in it

ImagR offers you the possibility to remove the background completely free.
A special thing is, ImagR doesn't compress your file in any way, it will stay the same quality and size.
However, creating a 100% working background removal is not possible.
We train our model continuously and improve it to give you the best possible results.
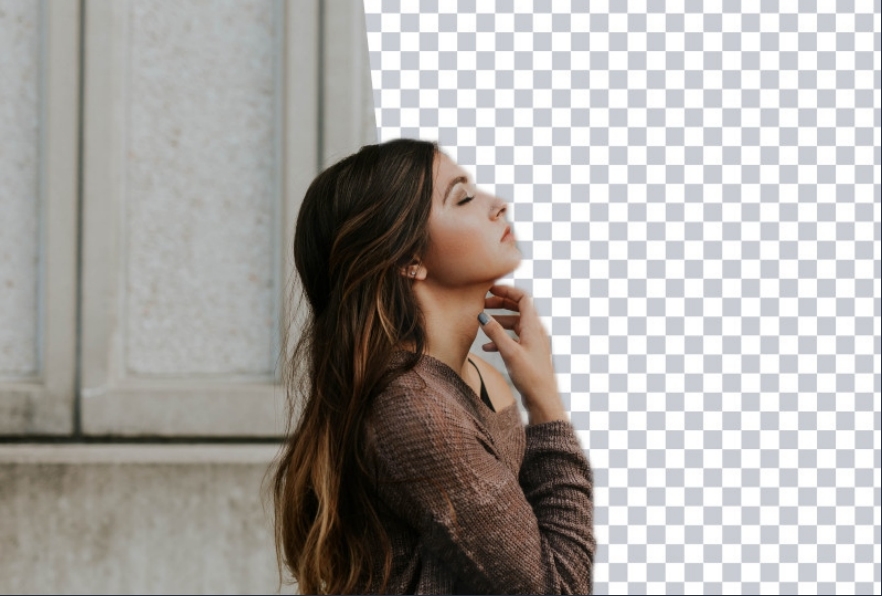

Just upload your image and ImagR will convert it.
Cartoonized images have a real special style when you engrave them.
Since the colors are way more consistent, they're also way easier to engrave.

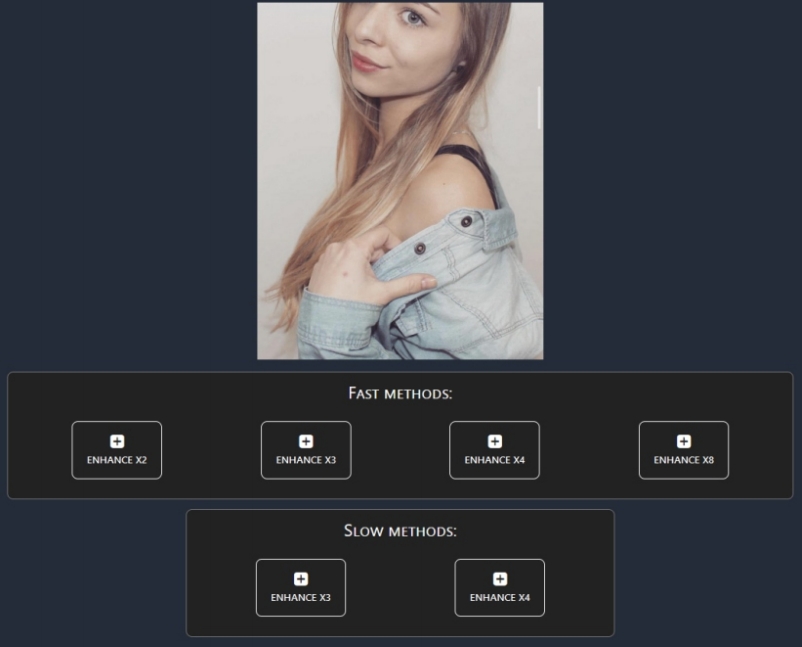
Upload your image and choose between the Fast or Slow methods.
The difference:
Let's say you upload an image with 1000px in width and 800px in height.
You need to use the fast methods, because the image is too big for the slow methods.
We recommend to resize all images above 500px with the fast methods.
If you will use the slow method anyways, it will probably take forever or show an error.
That's not really an error. It means the image would be way too big.
In example: When you use the x8 multiplicator on a 2k px image,
it would have 16k px after.
This could max out our server memory and takes too much ressources to calculate.

Upload your image and adjust the "Brightness Threshold" slider to your favorite detailed image. PNG and JPG/JPEG allowed.
Click the download button to download the previewed shape as SVG.
Perfect for converting logos, drawings, tattoos etc. to high quality SVG files.
Completely free, also for non-paid users.

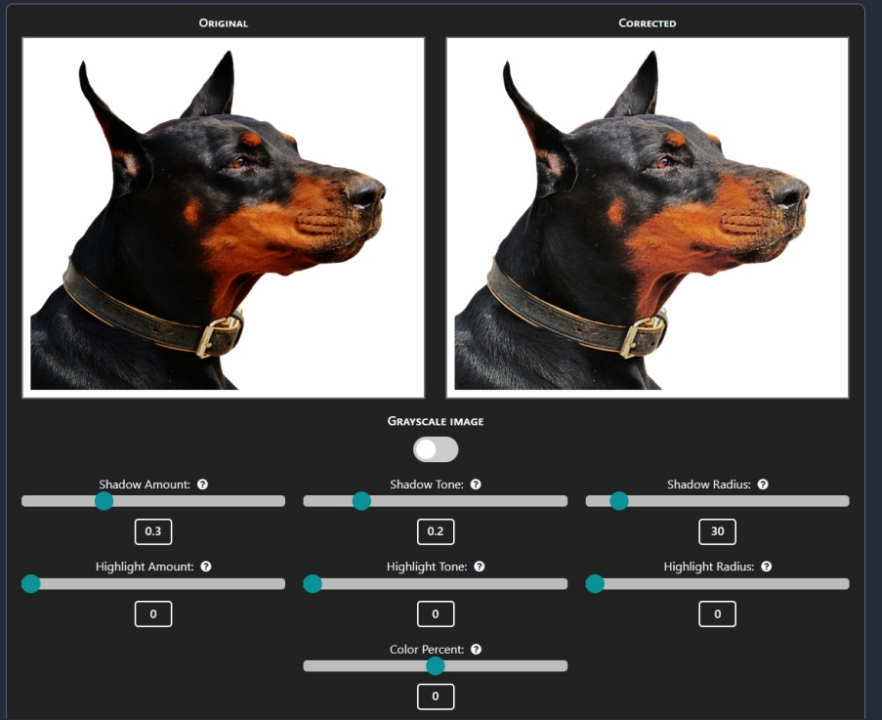
Often, when you try to prepare images, you will notice that some dark areas are not flexiblewith gamma, contrast or brightness.
That's because they all manipulate the image linear, means the whole image within a certain ratio.
With color correction you can adjust i.e only shadow areas, or only bright areas.
You can play around with the sliders underneath, but we already made a good "default" setting which works basically on every image.
We have two different sharpen methods because they adjust the images completely different.
Sharpen method 1 also offers you the opportunity to increase and decrease the intensity with the "Sharp Amount" Slider.
Method 2 adjusts the image completely automatically.
My personal preference is method 2, since it sharpens the details perfectly for engraving.
© imag-r.com